Make Quick Pickled Red Onions at home with 4 simple ingredients. This easy, sugar-free recipe is ready in 30 minutes and adds instant flavour to any meal.
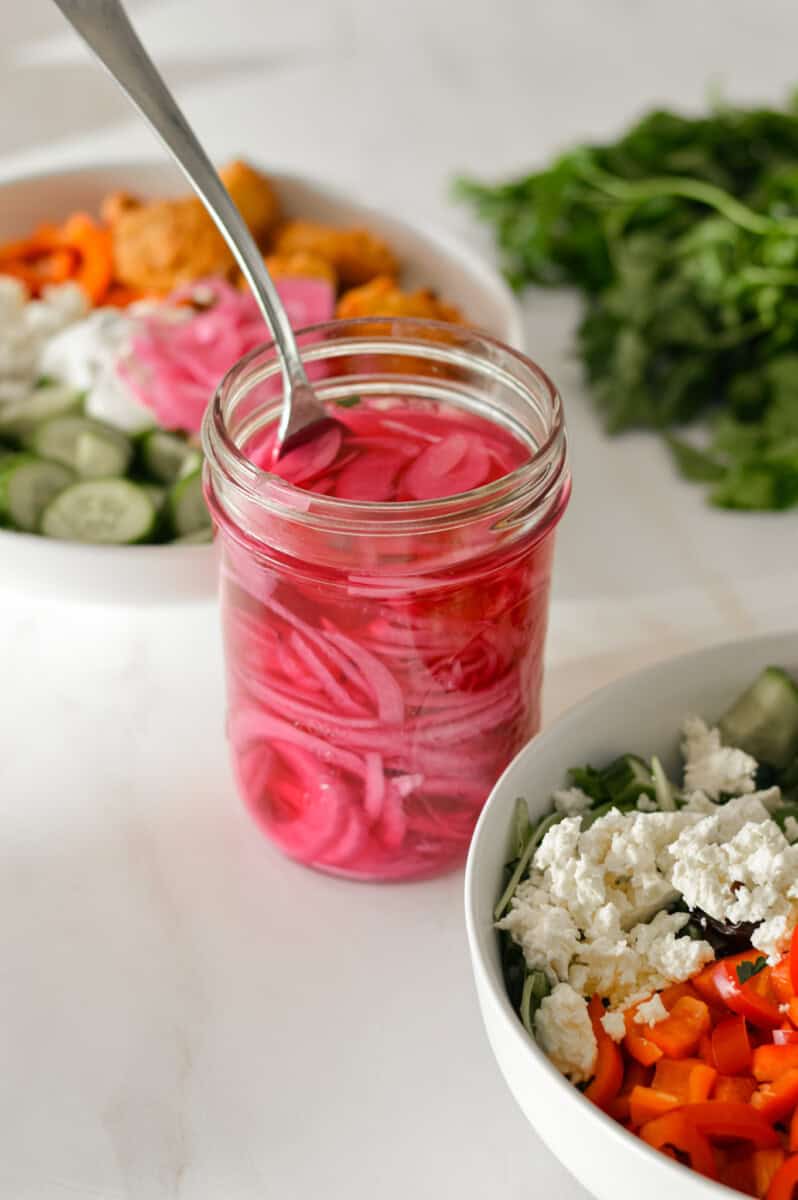
Quick Pickled Red Onions are one of those little add-ons that instantly make meals better. They add brightness, crunch, and that perfect tangy bite that cuts through rich or savoury dishes, and once you start keeping a jar in your fridge, you'll want to put them on everything.
I love this recipe because like my Raspberry Chia Jam or my Homemade Ranch Dip Seasoning, it's truly no-fuss. These are one of my favourite ways to upgrade bowls, salads, tacos, wraps, and sandwiches. Another bonus is that pickling onions makes them more gentle on digestion for a lot of people! If raw red onion usually doesn't agree with you, this is a great way to still get that onion flavour in a more digestible form, just be mindful of portions if you're sensitive.
Once you see how easy these are to make, you'll never go back to store-bought!
Why This Recipe Is Dietitian Approved
- Sugar-free option. Most pickled onion recipes rely on sugar in the brine, but this version skips it entirely while still delivering plenty of flavour. You get all the tang and crunch without unnecessary added sugar.
- Ready in 30 minutes. This is a true quick-pickle recipe, which means you don't need to plan ahead days in advance. The onions are ready to use in about 30 minutes and keep getting better as they sit.
- Only 4 ingredients. Simple recipes are easier to stick with, and this one keeps things as basic as it gets. Just onion, vinegar, water, and salt, with optional add-ins if you want to customize.
- Low FODMAP friendly in small portions. Did you know pickling red onions is a great way to make red onions more digestible! This is a great way to incorporate the taste of red onions into dishes for anyone living with IBS (be mindful of serving sizes)!
Quick Pickled Red Onions Recipe
Ingredients
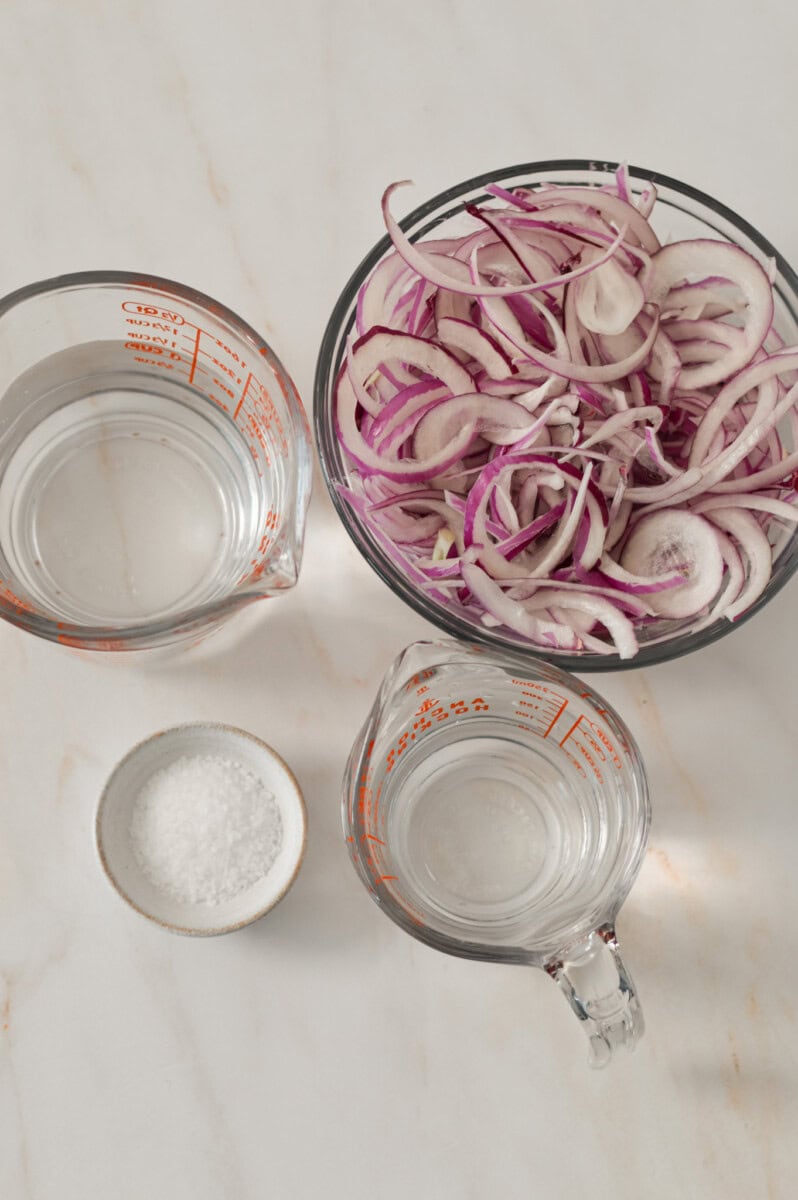
Red onion. You can't have pickled red onions without a red onion!
White vinegar. White vinegar is the key ingredient to making these pickled red onions at home
Salt. Any salt will work in this recipe! I use coarse table salt.
Distilled water. I recommend using distilled water to ensure the brine is clear. Sometimes depending on your location minerals in tap water may interfere with the brining, however if all you have is tap water don't worry!
The complete ingredient list with measurements can be found in the recipe card below.
Instructions
- Slice the red onion as thin as you can. I recommend SAFELY using a mandolin to cut then ⅛ of an inch thick (the thinner they are the faster they will pickle).
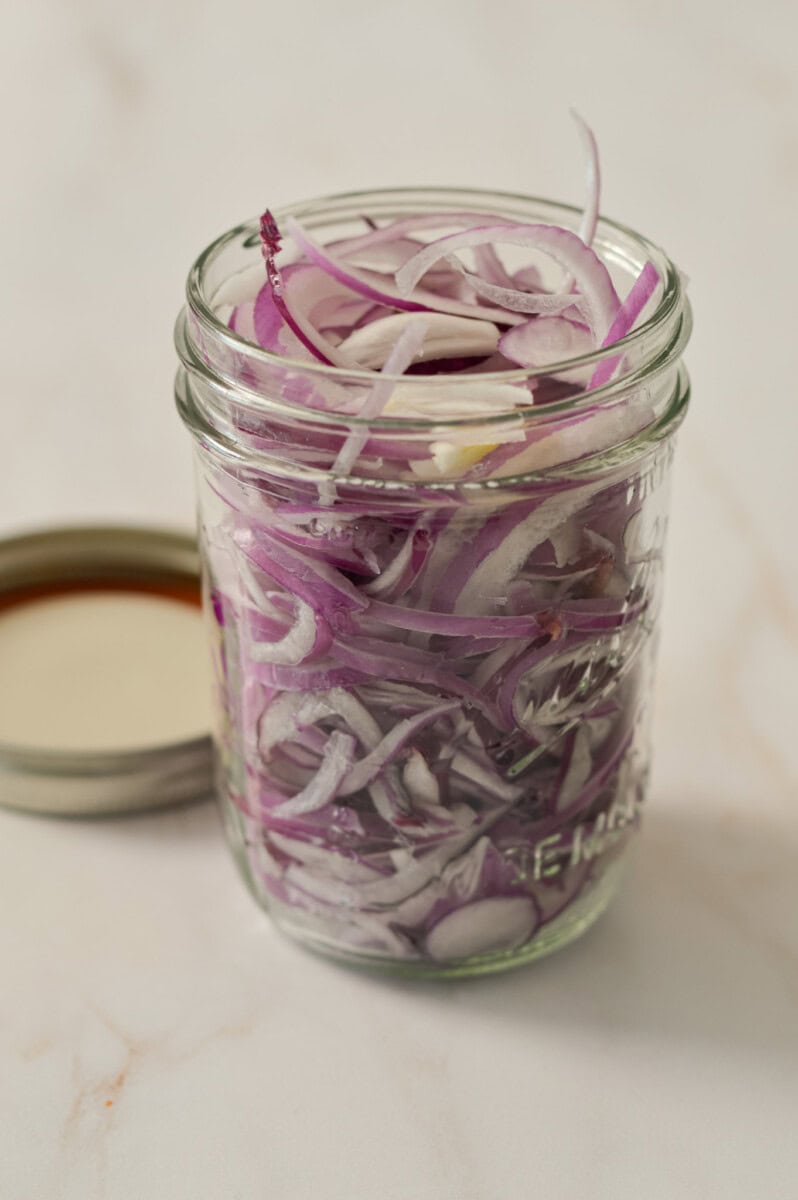
- Add the onions to a jar (I used a BLANK OZ jar). Gently press the onions down to ensure they are packed in. (the onions will shrink once pickled)!
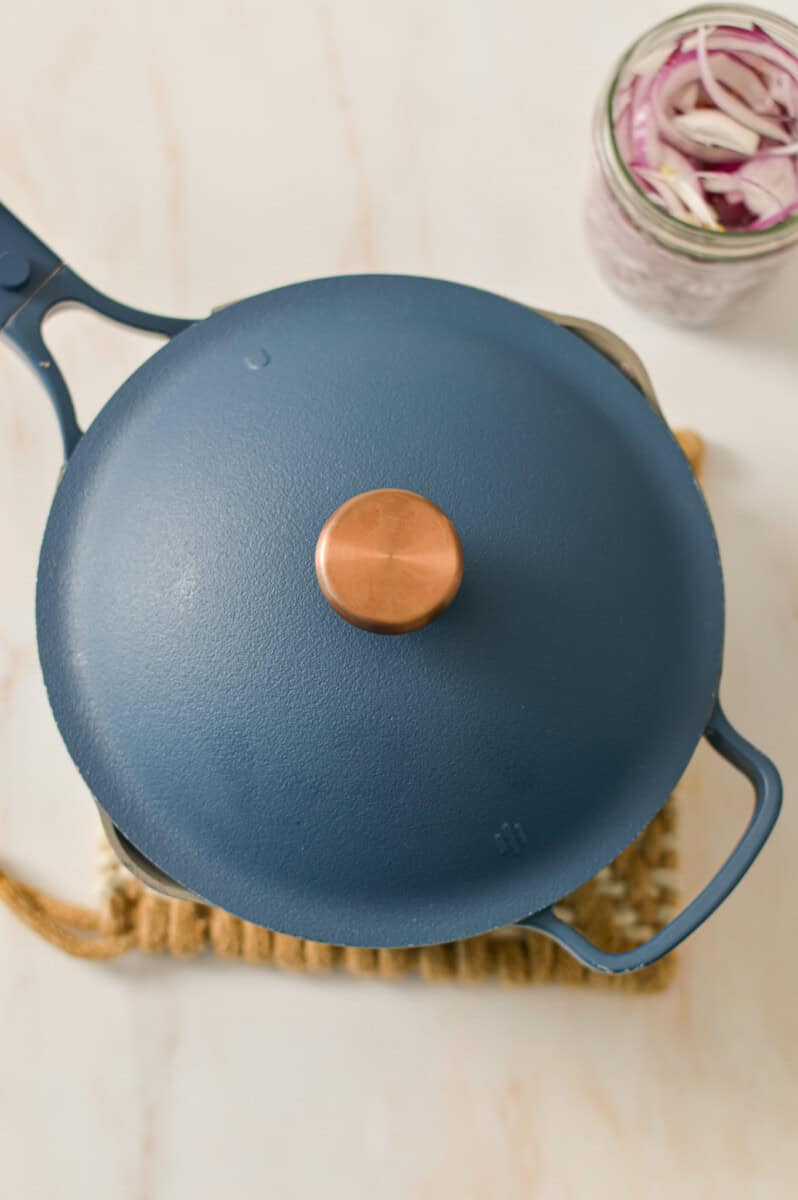
- In a saucepan over medium-high heat, add vinegar, water and salt. You may also add any other flavour enhancers you wish to use. Stir and bring to a low boil (you will notice the salt will now be fully dissolved).
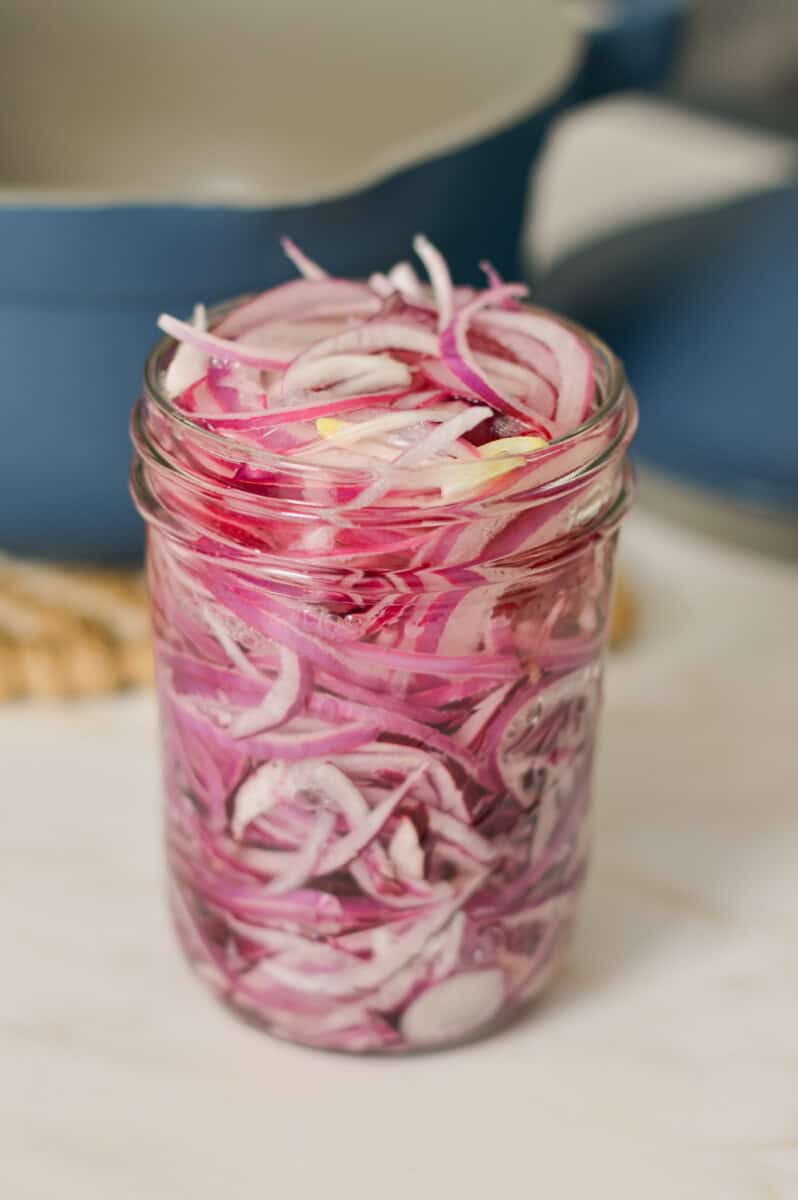
- Once boiling, carefully pour the liquid over the onions making sure all onions are fully submerged. Allow to sit on the counter uncovered for at least 30 minutes to cool fully. The onions are ready to eat after 30 minutes, however the longer they sit in the brine the more pickled they will be!
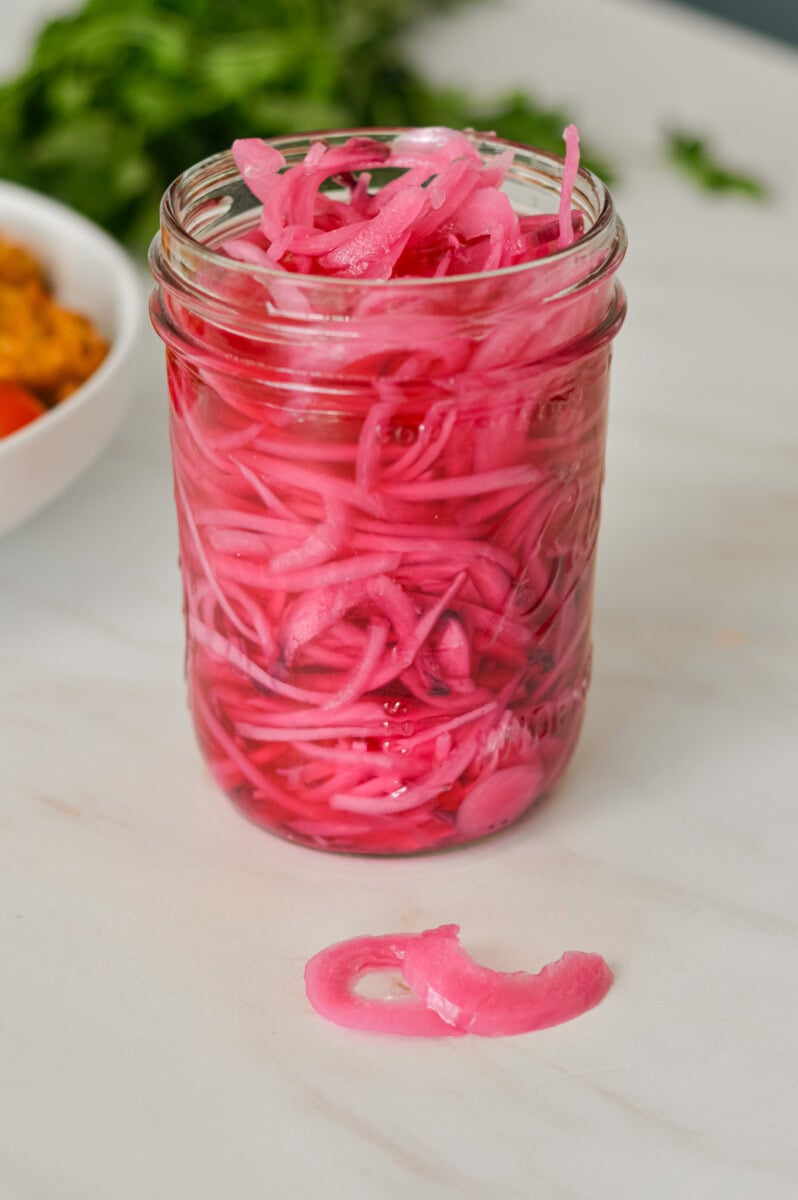
- Once cool, cover the jar and place in the fridge for up to 3 weeks!
Substitutions and Variations
This recipe is naturally gluten free,vegan, dairy free and nut free!
- Any type of onion can be used in this quick pickled onion recipe (not just red onions)
- For a different flavour try experimenting by using apple cider vinegar or red wine vinegar
Storage
These quick pickled onions can be stored in an airtight container in the fridge for up to 3 weeks!
Top Tips for Success
Although this is a quick pickling recipe and the onions will be ready in as little as 30 minutes- the longer they sit the more pickled they will be! (HINT: the more pink they are the stronger the flavour)
If you are noticing your onions are floating to the top of the jar and not staying submerged, place a plate over the jar!
Frequently Asked Questions
Yes! Just carefully, slice them as thinly as you can! The thinner the onions, the more flavour they will have and the quicker they will pickle.
While you do not need to, it speeds up the process of dissolving the salt in the vinegar water mixture creating a more immediate pickling effect (quick-pickle)!
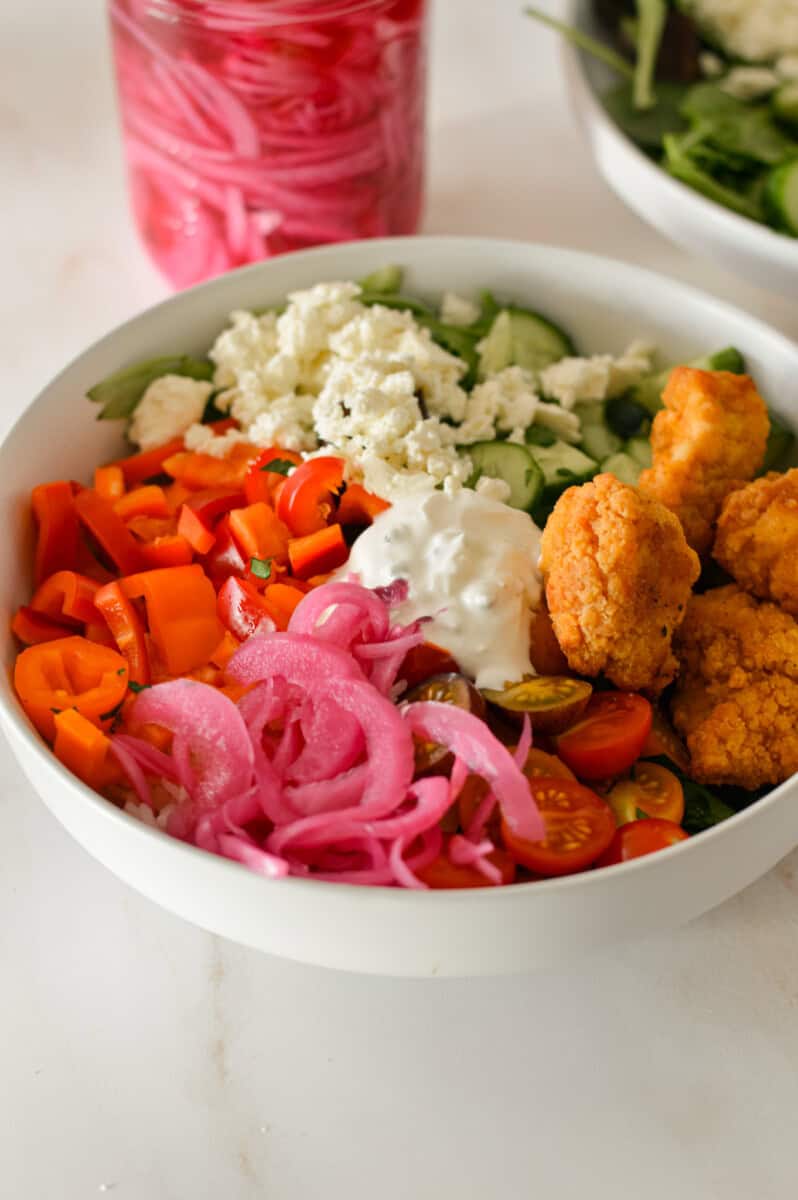
Some recipes I love adding these quick pickled onions to:
See you in the kitchen!
PS. I love seeing my recipes in action! If you decide to make these quick pickled onions, don't forget to snap a photo and tag me on Instagram- @nourishedbynic or leave a comment and rating below letting me know how you liked it!
📖 Recipe

Quick Pickled Red Onions
Ingredients
- 1 large red onion, thinly sliced (⅛th inch thick) (or enough to fit into your jar of choice)
- 1 ½ cups white vinegar
- 1 cup distilled water * see notes
- 1 tablespoon salt
Optional:
- 1 tablespoon honey or sugar (for a little sweetness)
- 1 tablespoon black peppercorns (for a little depth of flavour)
- 1 teaspoon red pepper flakes (for spice)
Instructions
- Slice the red onion as thin as you can. I recommend SAFELY using a mandolin to cut then ⅛ of an inch thick (the thinner they are the faster they will pickle).
- Add the onions to a jar (I used a 16oz jar). Gently press the onions down to ensure they are packed in. (the onions will shrink once pickled)!
- In a saucepan over medium-high heat, add vinegar, water and salt. You may also add any other flavour enhancers you wish to use. Stir and bring to a low boil (you will notice the salt will now be fully dissolved).
- Once boiling, carefully pour the liquid over the onions making sure all onions are fully submerged. Allow to sit on the counter uncovered for at least 30 minutes to cool fully. The onions are ready to eat after 30 minutes, however the longer they sit in the brine the more pickled they will be!
- Once cool, cover the jar and place in the fridge for up to 3 weeks!


Twila says
Why distilled water?
Nicole Addison says
Hi Twila I actually have that answered in the blog post above! I recommend using distilled water to ensure the brine is clear. Sometimes depending on your location minerals in tap water may interfere with the brining, however if all you have is tap water don’t worry!
Nicole Addison says
These are my favourite ingredient to level up bowls, salads, wraps or sandwiches!!! I hope you enjoy!